Cisdem DVD Burner for Mac — Step-by-Step Guide to Creating Professional DVDs (Disc, Folder, ISO)
Cisdem DVD Burner for Mac is a full-featured DVD authoring and burning application for macOS. It lets you turn everyday videos (MP4, MOV, MKV, AVI, etc.) into a playable DVD Disc with menus and chapters, or export a DVD Folder / ISO file for archiving and later burning. The interface is intentionally clean—add your clips, customize menus if you want, and burn. This page focuses on a practical, screenshot-driven workflow so you can go from raw video to a polished DVD in minutes.

Burn from common formats (MP4, AVI, MOV, MKV, WMV, FLV, etc.) and high-resolution sources to DVD Disc, DVD Folder, or ISO.
Why Use a Mac DVD Burner in 2025?
Streaming is convenient, but physical media still matters. A DVD plays offline, works on legacy TV players, and provides a consistent menu-based experience that’s easy for families, clients, guests, and event attendees. For classrooms, weddings, memorials, recitals, sports highlights, and legal records, a disc is tangible and archivable. Cisdem DVD Burner for Mac gives you the authoring control to make your videos look intentional: menus, chapters, subtitles, background music, aspect ratio settings, and playback modes.
What Cisdem DVD Burner for Mac Can Do
- Author playable discs for living-room DVD players (DVD-5 or DVD-9, ±R/±RW, Dual-Layer).
- Export to DVD Folder (VIDEO_TS) or ISO for backup, review, or future duplication.
- Menu designer with themed templates (Classic, Holiday, Birthday, Wedding, etc.) or “No Menu.”
- Built-in editor: trim, crop, rotate, adjust brightness/contrast, add effects, watermarks, and subtitles.
- Chapters & thumbnails for quick navigation and a professional, easy-to-use structure.
- Playback modes and TV standard (NTSC/PAL) controls for global compatibility.
Supported Inputs & Outputs
Import popular video formats such as MP4, MOV, MKV, AVI, WMV, MPEG, 3GP, FLV, M2TS/MTS/TS, and more, including many 4K/5K/UHD sources from action cams and smartphones. Output choices:
- DVD Disc: DVD-5 (single layer) or DVD-9 (dual layer), DVD±R/±RW, DL.
- DVD Folder: VIDEO_TS + AUDIO_TS structure you can test with a player app.
- ISO Image: A single master file ideal for archiving or mass duplication later.
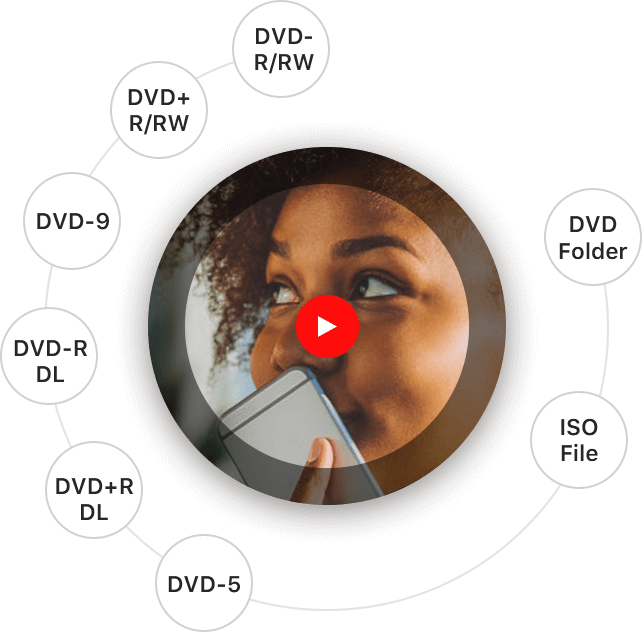
Choose Disc, Folder, or ISO; support for DVD-5, DVD-9, DVD±R/RW, and more.
Step-by-Step Tutorial — Burn a Polished DVD on Mac
This section walks you through one complete project—from adding raw clips to producing a final disc. Even if you plan to export a folder or ISO, the steps are nearly identical; you’ll choose the desired target in the final stage.
Step 1 — Add Your Videos to the Project
Launch the app and start a new project. Import videos by drag & drop from Finder, or click the add button to select files. You’ll see thumbnails for each title in the Source view. Reorder by dragging. If you’re authoring a slideshow or interview segments, consider the final playback flow in this stage so your chaptering later is simpler.
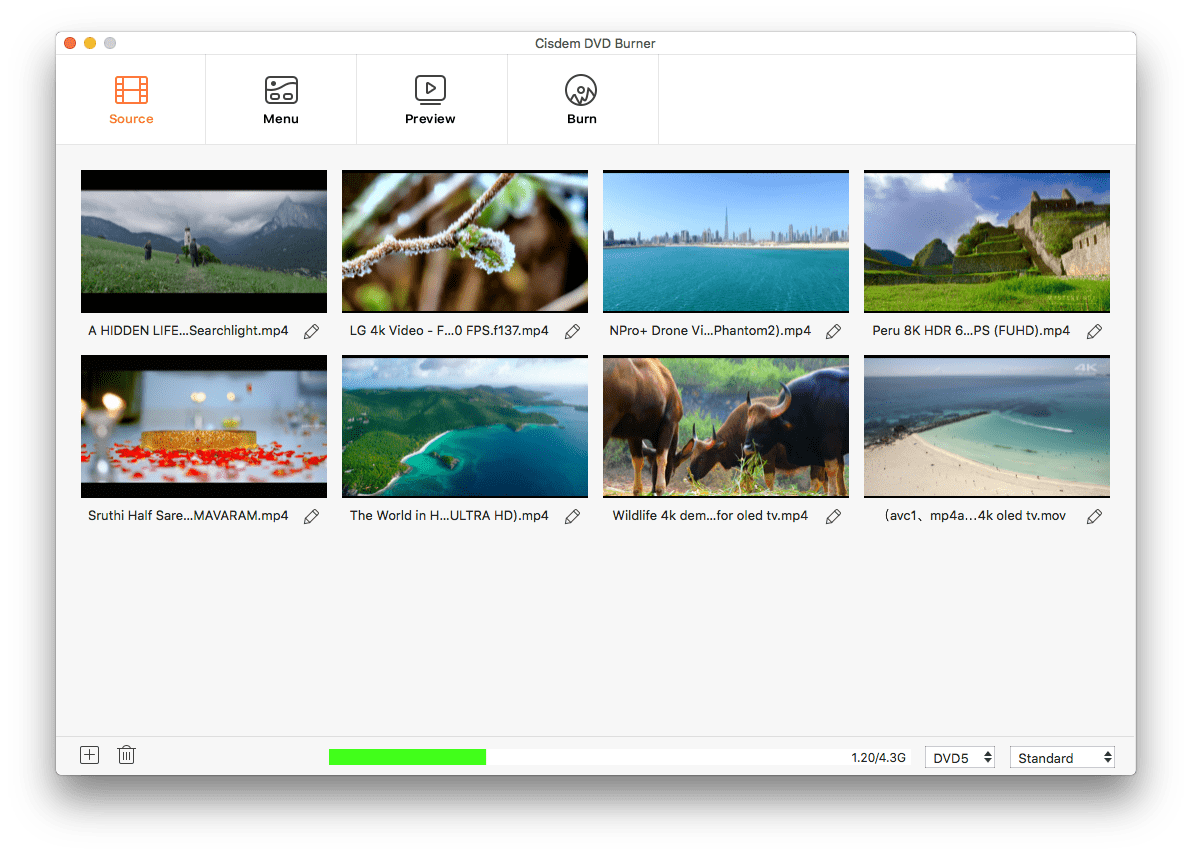
Add and arrange clips; the capacity bar helps you stay within DVD-5 or DVD-9 size limits.
Step 2 — Trim, Tidy, and Enhance (Optional)
Double-click a clip or choose the editing option to open the built-in editor. Here you can trim heads/tails, split long recordings into neat parts, crop to remove letterboxing, rotate to correct orientation, and adjust brightness/contrast/saturation. You can also add text or image watermarks (e.g., your studio logo) and load subtitles (SRT or ASS). Make small changes and preview in real time so you can judge the result on a simulated player.
Step 3 — Design a Menu (or Go “No Menu”)
Switch to the Menu tab to choose a theme and customize it. Cisdem includes a variety of templates for different occasions—Classic, Holiday, Party, Birthday, Wedding, and more. Change the background (solid color or image), choose button style, show or hide labels, edit the title text, and set fonts and colors. If you want a simple disc that starts playing immediately, select No Menu.
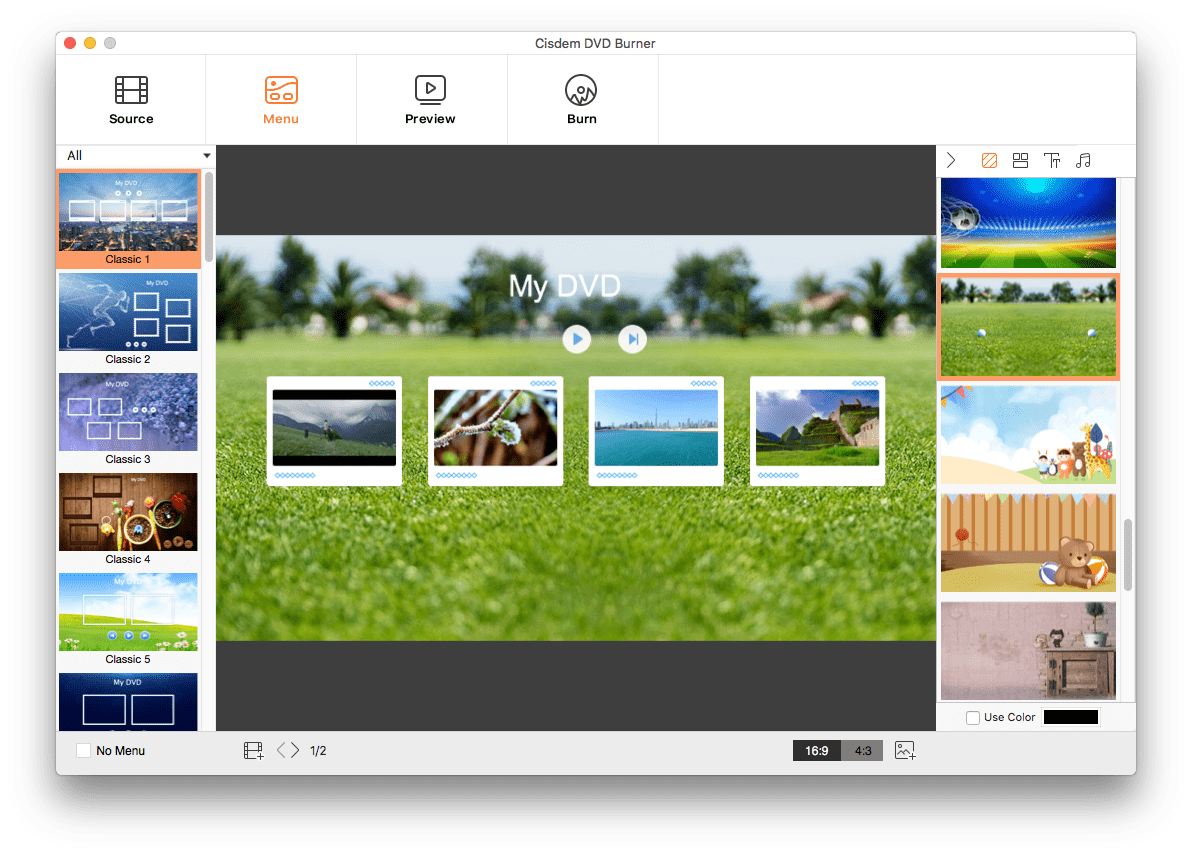
Customize the theme, layout, thumbnail style, and background music; toggle between 16:9 and 4:3 aspect ratios.
Step 4 — Add Chapters & Thumbnails
For longer videos, add chapters to improve navigation. Use logical breakpoints—speeches at a wedding, scenes in a documentary, or topics in a training course. You can also pick a thumbnail frame that represents each title on the menu (or load a custom image), which makes the disc feel deliberate and easy to browse.
Step 5 — Choose Output (Disc, Folder, or ISO)
Switch to the Burn tab. Pick your target:
Burn to Disc for a physical DVD, Save as DVD Folder for a VIDEO_TS structure you can test immediately, or Save as ISO for a single master file. Select TV Standard (NTSC in North America/Japan; PAL in much of Europe/Asia), choose a Playback Mode (e.g., start at menu and play all titles sequentially), confirm the burner drive or folder path, and set the number of copies.
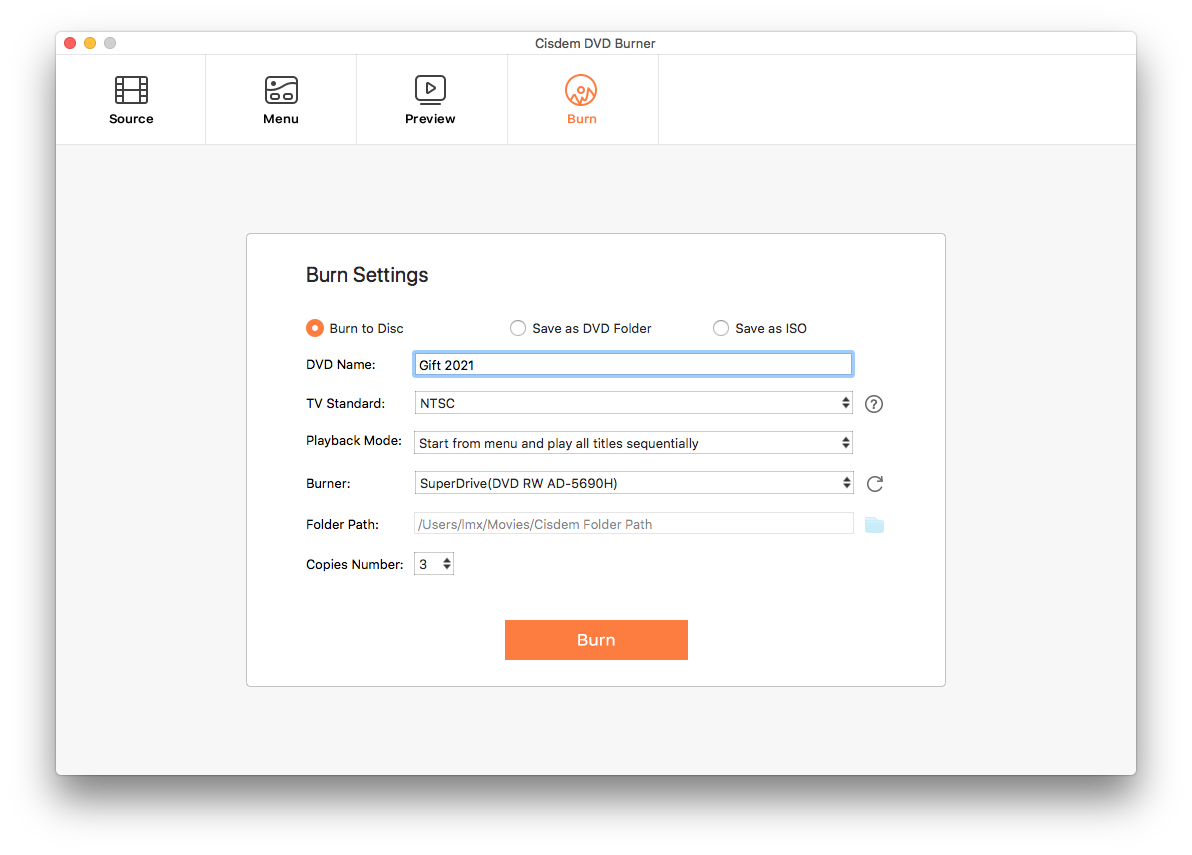
Finalize your project with the Burn panel: pick target, TV standard, playback behavior, and copies.
Step 6 — Preview Before You Commit
Use the Preview mode to simulate the disc experience. Click through menus, jump between chapters, and make sure subtitle timing and audio levels feel right. Previewing catches small layout issues or typos before you burn multiple copies.
Step 7 — Burn & Verify
When ready, insert a blank disc if you’re burning to DVD, or verify your output folder/ISO location for file-based targets. Start the burn. After completion, test on a hardware DVD player and on a Mac/PC app to confirm menus, chapters, and audio play as expected. If you need additional copies, Cisdem can write them without re-authoring the whole project.
Practical Tips for Professional-Looking DVDs
- Aspect ratio & framing: Match your menu aspect ratio (16:9 or 4:3) to the source footage and target display; crop letterboxing to keep titles clean.
- Consistent loudness: Normalize volume across clips; add subtle fade-ins/outs to smooth transitions between scenes.
- Readable subtitles: Use a high-contrast font and check timing carefully; keep line length short for TV viewing distance.
- Chapters with intent: Break longer content into meaningful sections that match the event schedule or lesson plan.
- Capacity planning: The size indicator helps you decide between DVD-5 and DVD-9; for very long programs, prefer ISO or Folder first to test playback.
- Playback behavior: If the disc is for guests or clients, “Start at menu” is often best; for kiosks or background playing, “Auto-play and loop” can be ideal.
Use Cases & Workflow Ideas
Family Events (Weddings, Birthdays, Graduations)
Compile smartphone clips and professional footage into a single disc with a Wedding or Birthday template. Add subtitles for vows or speeches, include background music on the menu, and set chapters for Ceremony, Toasts, First Dance, and Highlights. Export an ISO as a master, then burn discs for relatives.
Education (Lectures, Recitals, Student Projects)
Teachers can create units with per-topic chapters and a clean classic menu. For music recitals, add a chapter per performer and include subtitle cards with performer names and pieces. The resulting disc is perfect for grading, archives, and parent distribution.
Small Business & Creative Studios
Brand your menu background and add a watermark to render proofs that are easy to navigate. For conferences or training, set the playback mode to play all sequentially so the disc behaves like a guided program without requiring manual clicks.
Troubleshooting Quick Guide
My disc won’t play on an older DVD player.
Confirm the TV Standard (NTSC vs PAL) matches the region where the hardware player is used. Also burn to a supported disc type (DVD-R is broadly compatible). If authoring from heavily compressed sources, try burning at a moderate speed and preview the VIDEO_TS folder first.
The menu looks cropped on my TV.
Some TVs overscan. Keep key text and buttons within safe margins and use the preview to test. If necessary, choose a different template with larger button spacing.
Audio levels are inconsistent across clips.
Use the editor’s volume controls to normalize, and add fade-ins/outs between scenes. If the source is extremely quiet, consider boosting in your video editor first, then authoring in Cisdem.
Pros & Cons
Pros
- Clear, guided workflow (Add → Edit/Menu → Burn) with real-time preview.
- Professional authoring: menus, chapters, subtitles, thumbnails, playback modes.
- Multiple outputs (Disc, Folder, ISO) for distribution and archiving flexibility.
- Works with common formats (MP4/MOV/MKV/AVI, etc.) including many UHD sources.
- Capacity and quality controls help avoid oversize projects and preserve fidelity.
Cons
- Advanced multi-track audio mixing or complex color grading should be done before authoring.
- To burn physical discs, you’ll need an internal or external DVD writer for your Mac.
Frequently Asked Questions
Can I create an ISO first and burn later?
Yes. Choose Save as ISO in the Burn tab. This produces a pristine master you can duplicate on any compatible Mac or PC later without re-authoring.
Does Cisdem DVD Burner support chapters and subtitles?
Yes. You can insert chapters for easy navigation and load SRT/ASS subtitles during authoring so viewers can toggle them on the final disc.
Which disc types can I burn?
DVD-5 and DVD-9 on DVD±R/±RW (including Dual-Layer), plus file-based outputs (Folder/ISO). For maximum compatibility with standalone players, DVD-R is a safe choice.
Will it work on Macs without an optical drive?
Yes—export to DVD Folder or ISO if you don’t have a burner. To make a physical disc later, connect a USB DVD writer or use another computer with a drive.
Conclusion — A Simple Path to Professional DVDs on macOS
Cisdem DVD Burner for Mac gives you everything you need to deliver a reliable, menu-driven DVD experience: broad format support, a friendly editor, customizable templates, and flexible outputs (Disc/Folder/ISO). Whether you’re producing family keepsakes, classroom materials, or client deliverables, the step-by-step workflow above will help you go from clips to a polished disc quickly—and with control over every detail that matters.